How to Make a Plumber Website with WordPress (Step by Step)
A plain-words guide to building a plumber website on WordPress, from domain and hosting to the pages, call buttons and quote form that bring in jobs.
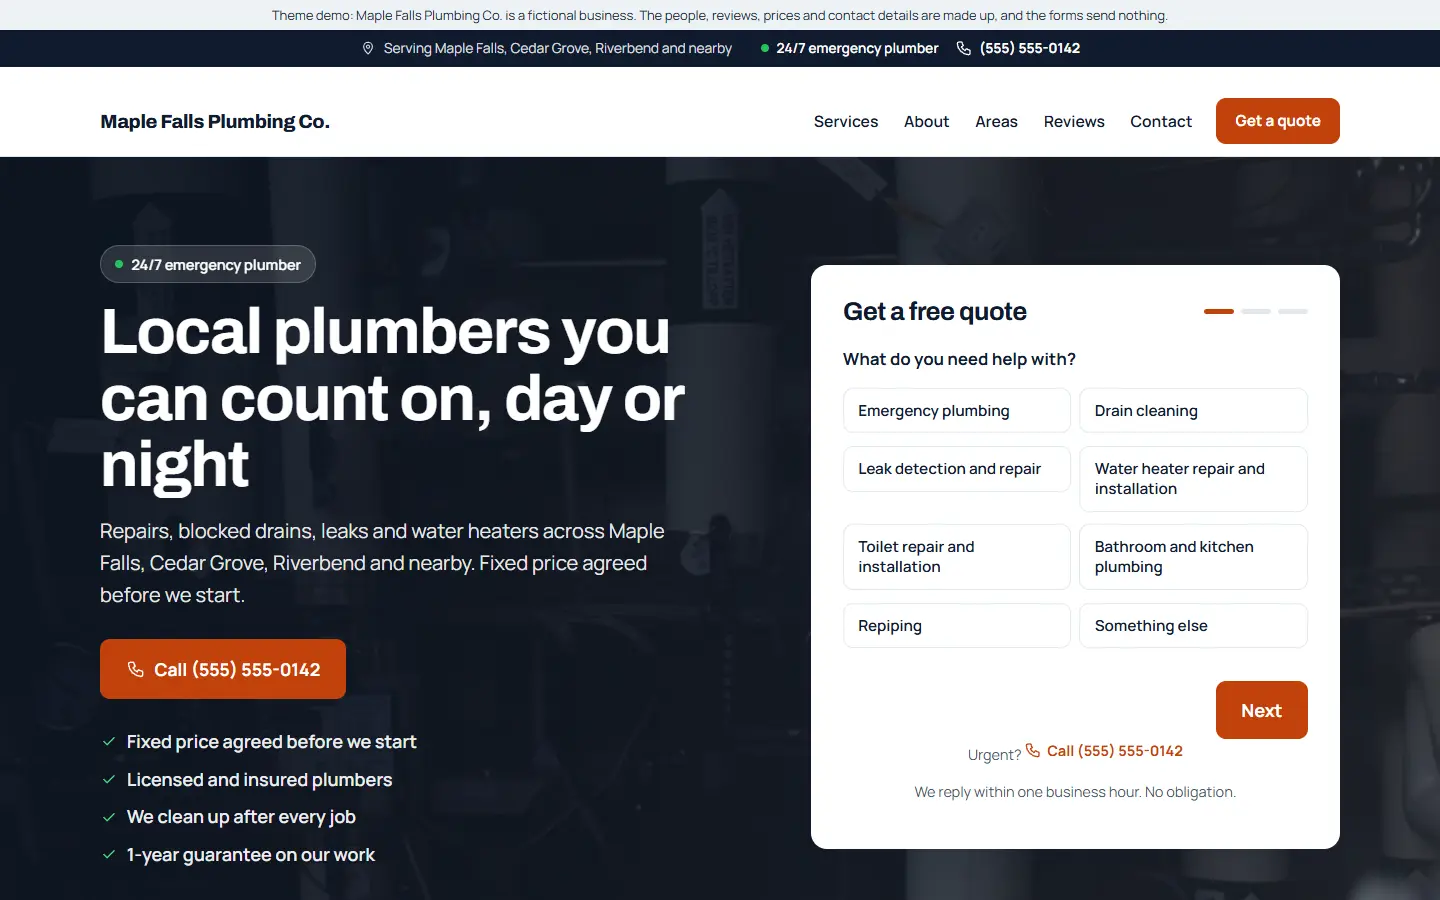
A plumber’s website has one job: turn a worried person with a leak into a phone call or a quote request. It does not need to be big or clever. It needs to load fast on a phone, show what you do and where, and make calling you the easiest thing on the page.
This guide walks through building one with WordPress, step by step. You can follow it with any theme. At the end we show how the same steps look with our plumbing template, in case you want a head start.
Step 1: Get a domain name and hosting
The domain is your address, such as yourplumbing.com. Pick something short that people can say on the phone and spell without help. Your business name, or your name plus “plumbing”, usually works best. Avoid hyphens and numbers.
Hosting is where the website lives. Choose a host that offers:
- One-click WordPress install, so you do not have to set it up by hand
- A free SSL certificate, so your site opens on https and browsers do not warn visitors
- Daily backups, so a mistake is never permanent
- PHP 8.1 or newer, which modern WordPress themes and plugins expect
Most hosts sell the domain too. Keeping both in one place makes life simpler.
Step 2: Install WordPress
Use your host’s one-click installer. When it asks for a site title, use your business name. When it is done, log in at yourdomain.com/wp-admin.
Two settings to change straight away:
- Settings > General: check the site title and the time zone.
- Settings > Permalinks: choose “Post name”, so pages get clean addresses like /drain-cleaning/ instead of /?p=123.
Step 3: Choose a theme made for trades
The theme decides how the site looks and what it can do without extra plugins. A general theme can work, but you will spend hours adding call buttons, service pages and forms. A theme made for local service businesses has those ready.
What to look for:
- A working demo you can try on your phone. Most people who need a plumber search on their phone, often in a hurry.
- Call buttons built in, in the header and fixed to the bottom of the screen on phones.
- A quote form, not just a contact form.
- Pages for services and service areas.
- A block theme, edited in the normal WordPress editor. You do not depend on a page builder plugin, and pages stay light and fast.
- A setup guide and a changelog. They tell you someone looks after the theme.
Step 4: Plan the pages a plumber website needs
Keep it simple. These pages cover what customers and Google look for:
| Page | What it is for |
|---|---|
| Home | Who you are, what you fix, where you work, and a big call button |
| Services | A list of everything you do, each linking to its own page |
| One page per service | Drain cleaning, leak repair, water heaters, emergency plumbing and so on |
| Service areas | The towns and neighbourhoods you cover |
| Reviews | What real customers say |
| About | Who you are, your licence and insurance, how long you have worked locally |
| Get a quote | A short form for jobs that are not emergencies |
| Contact | Phone, email, opening hours, and a map if you have a workshop |
Why one page per service? Someone searching “water heater repair” wants to land on a page about water heaters, not a long list. Each service page can explain the problem, what you do, roughly what it involves, and end with a call button. It also gives Google a clear page to show for that search.
Step 5: Make calling you effortless
Most plumbing jobs start with a phone call. On every page:
- Put your phone number in the header, as a link that dials when tapped (a “tel:” link).
- On phones, add a bar at the bottom of the screen with Call and Get a quote buttons, so they are always one tap away.
- If you offer emergency call-outs, say so near the top of the home page, with the number.
Test it yourself: open the site on your phone and see how many taps it takes to call you. The answer should be one.
Step 6: Add a short quote form
Not every job is an emergency. For a bathroom refit or a new water heater, people prefer to describe the job and wait for a price. Keep the form short:
- What do you need help with? (a list of your services)
- When? (as soon as possible, this week, flexible)
- How can we reach you? (name, phone, and optionally email and postcode)
Splitting it into small steps makes it feel quick. Make sure the requests arrive somewhere you will see them, by email and ideally in a list inside WordPress too, so nothing gets lost in a spam folder.
Step 7: Help Google understand your business
Local customers find plumbers on Google, so help it understand who you are and where you work:
- Set up your Google Business Profile and link it to your website. Use exactly the same business name, address and phone number on both.
- Write page titles that say the service and the area, such as “Drain Cleaning in Springfield | Your Plumbing Co”.
- Add business details Google can read (structured data, also called schema): your business type, phone, address, opening hours and the areas you serve. Some themes add this for you from your settings.
- Link your Google reviews from your website, so visitors can read them where they are hosted.
Step 8: Show why people can trust you
People let a plumber into their home, so trust matters as much as price:
- Your licence and insurance details, if your area requires them
- Real reviews from real customers, never made-up ones
- Photos of your own van, team and work, rather than stock photos where you can
- Clear opening hours and whether you offer emergency call-outs
- Any guarantee you genuinely offer on your work
Step 9: Check speed and phones
A slow site loses visitors before it even appears. Before launch:
- Test your home page with Google’s free PageSpeed Insights and look at the mobile result.
- Resize photos before uploading them. A photo straight from a phone is often several megabytes; a web page rarely needs more than a few hundred kilobytes per image.
- Open every page on your own phone and tap every button.
Step 10: Launch checklist
- Phone number correct everywhere, and it dials when tapped
- Quote form sends to an inbox you check, tested with a real request
- Every service has its own page
- Service areas listed
- Business name, address and phone the same as on your Google Business Profile
- Site opens on https
- Privacy page published (needed when you collect form details)
- Checked on a phone
Doing it faster with a plumbing template
Everything above can be built from scratch. If you would rather start from a finished website and change the details, that is what we made Mainstay for. It is a WordPress block theme for local trades, and its plumbing template covers steps 3 to 8 in one import:
- The pages from step 4, ready to edit: home, services, a page for each of 7 plumbing services, service areas, reviews, about, get a quote and contact.
- Call buttons in the top bar, the hero and the footer, plus a call and quote bar on phones.
- A three-step quote form, with the questions from step 6 and a Quote requests list inside WordPress.
- One settings page for your business name, phone, hours and towns. They appear everywhere on the site, and in the business details Google can read.
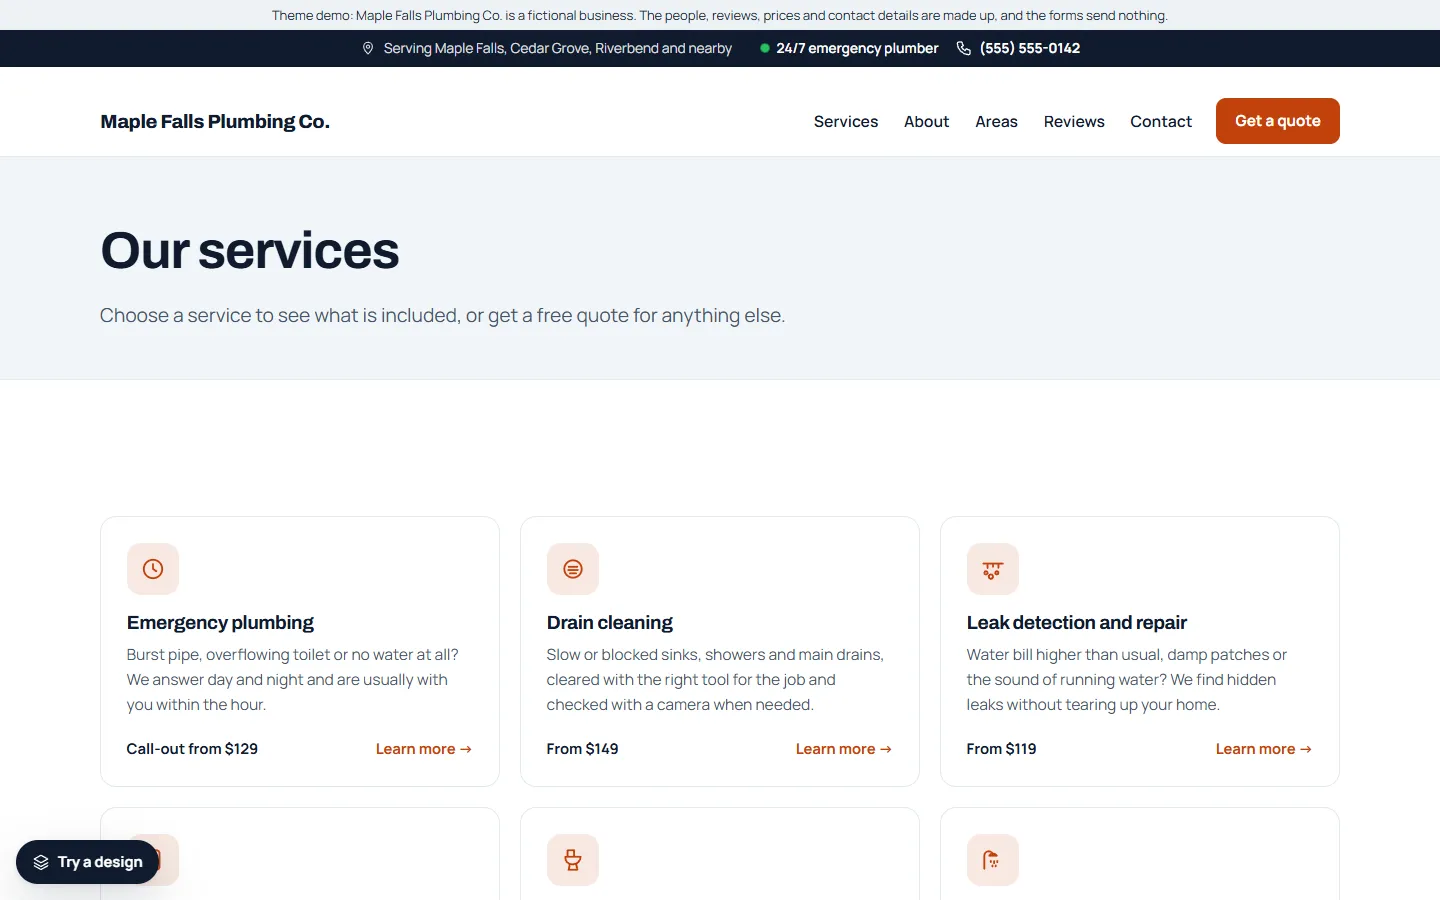
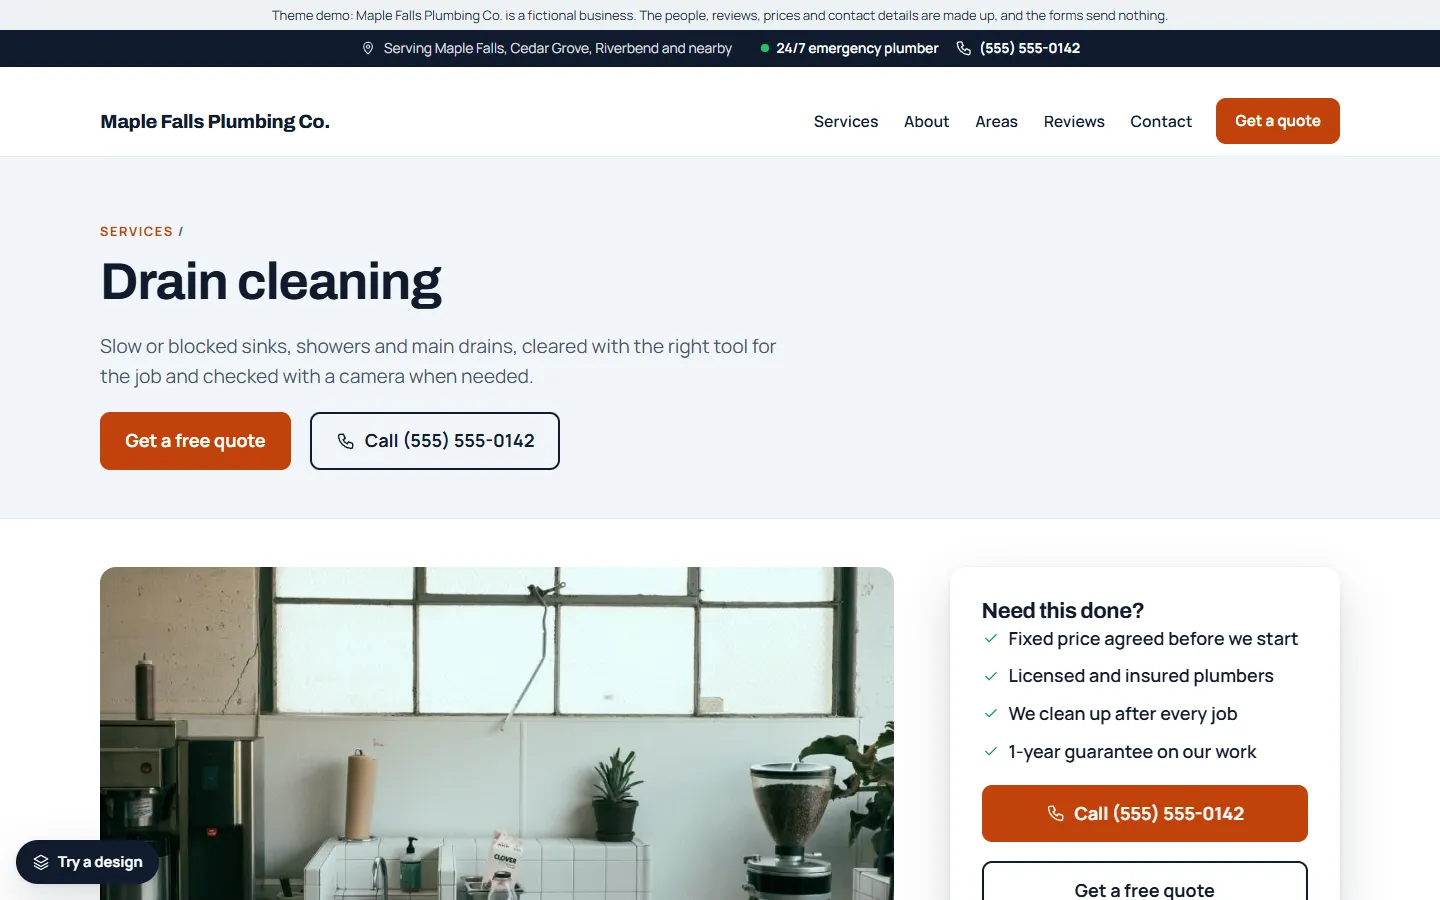
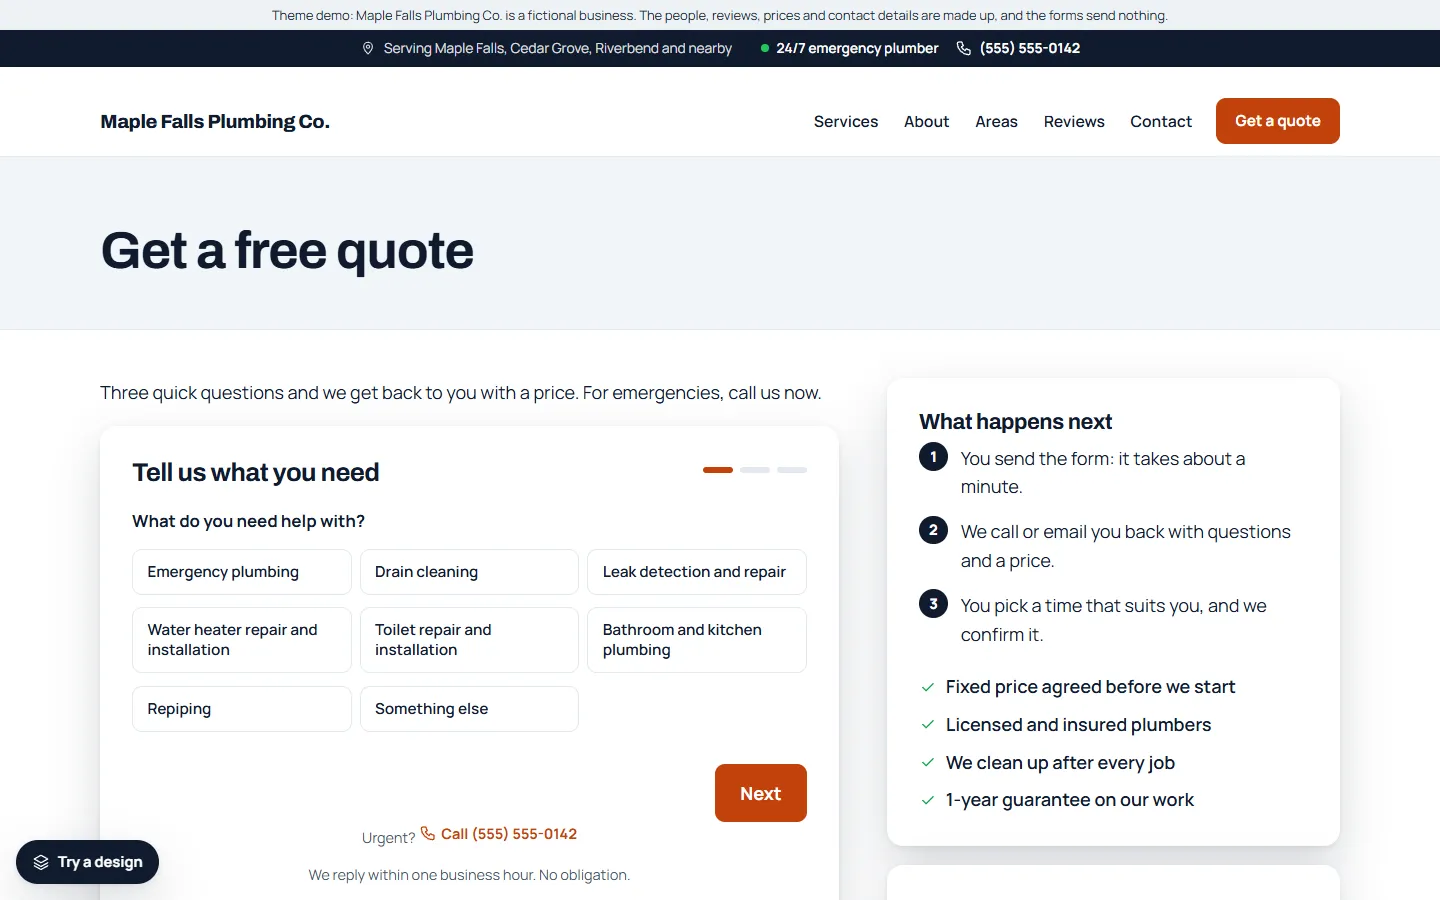
The demo business in the screenshots, Maple Falls Plumbing Co., is made up. You can try the live demo on your phone, and read the full setup guide before you buy.